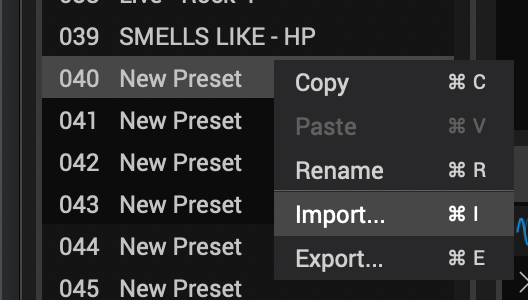
helixpatches.com

how to install
line6 helix presets

Step 1: Purchase and Download the Preset

  • Find a Webshop: Start by visiting a reputable webshop that sells Line6 Helix presets.
  • Browse and Purchase: Look through the available presets, pick the ones you like, and complete the purchase.
  • Download the Preset: After purchasing, you’ll receive a download link. Click on it to download the preset file (usually in .hlx format or .zip) to your computer.

    .hlx: This format can be imported directly into hx edit/native.
    .zip: You first have to unpack this file in order to access the .hlx file(s) inside.

Step 2: Open HX EDIT/NATIVE

If you haven’t already, go to the Line6 website and download the HX Edit software.

Step 3: Connect Your Line6 Helix Device

  • Power On Your Helix: Turn on your Line6 Helix device.
  • Connect via USB: Use a USB cable to connect your Helix device to your computer. Make sure your Helix is recognized by your computer.

Step 4: Import The Preset Into HX EDIT/NATIVE

  1. Right-click on an empty preset slot.
  2. Select Import…
  3. Locate the .hlx file you downloaded.
  4. Click Open
  5. ‘Yes’ to Overwriting the preset

Step 5: Customizing

  • Check the Levels! 
    Make sure there is no digital clipping!
  • Adjust Amp Drive, Master & Ch Vol
    Every guitar reacts differently to different amp setups.
    The most effective parameters are the Drive & Master of the Amp. The Ch Vol acts as a volume control.
  • Tweak Effects
    Get creative and tweak the effects to your specific sound preferences

Visit LINE6 Helix Store

Free pack

Try our patches for free!